Continuous Bias Binding Calculator
Plan continuous bias tape from a fabric square. See full-width bands, discarded fabric and the square needed for your required length.
ONE SQUARE · ONE CONTINUOUS STRIP
See where your bias binding comes from
Plan the two-seam method from a square of woven fabric. See full-width bands, seam allowances and the narrow offcut before cutting.
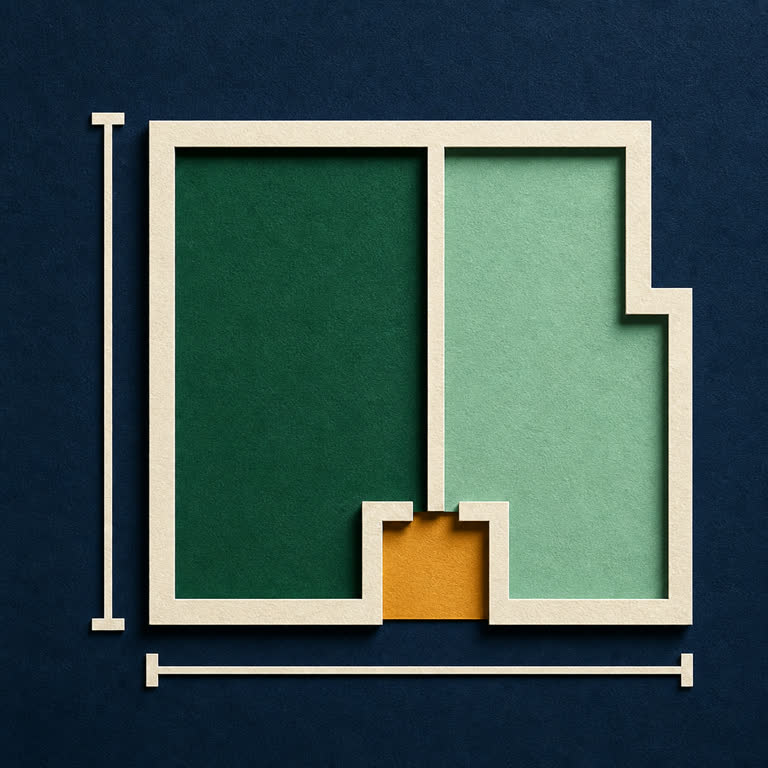
7 full bands · 2 in wide before folding.
Conservative planning estimate · two sewn joins · pointed ends trimmed
Mark 7 full bands, each 2 in wide, parallel to the long bias edge. Discard the remaining 1.38 in-wide band. Bring the short edges together with right sides facing and match each line to its neighbour at the dashed stitch line — not at the raw edge. Leave one band offset.
The estimate excludes seam allowances and squared-off tips. It is a conservative flat-layout estimate, not a measured or guaranteed textile yield.
Cut width is not finished width
Enter the flat width you will cut. A tape maker may require roughly twice its single-fold finished width, while double-fold edge tape can require roughly four times its finished width. French-fold quilt binding is a different construction. Follow your pattern or maker’s specification; this tool does not infer a cut width from a finished binding label.
How the estimate works
With square side S, seam allowance a and cut width w, the first sewn join forms a parallelogram with height (S − a) / √2 and base √2 × (S − a). Count only complete bands: N = floor((S − a) / (√2 × w)). The narrow remainder is discarded.
Joining the short edges one band apart leaves a stitch-to-stitch distance C = √2 × (S − 3a) along each band. The conservative squared-end length is N × C − w. Both terminal seam allowances are excluded, and the pointed ends are trimmed square. This is a flat geometric planning model, not the maximum recoverable length or a guarantee after stretching, pressing or uneven cutting.
The reverse calculation selects the smallest square, on your rounding increment, whose model length reaches the requirement. Band counts change in steps, so a slightly larger square can sometimes add an entire band. Allow your own project reserve in the required length. Dimensions are rounded to the nearest micrometre (0.0001 cm); use decimals, not mixed fractions.
Square sizes: 2–100 in (5.08–254 cm); strip widths: ¼–6 in (0.635–15.24 cm). At least two full bands must fit. The diagram is a reduced guide, not a full-size template. It does not model fabric stretch, shrinkage, print matching, cording diameter or rectangular offcuts.
Before you cut
Use a stable woven fabric. Cut the square diagonally, join the triangles with right sides together and press the seam open. Mark lines parallel to a long bias edge, at your cut width, and remove the incomplete band. Match the lines at the second stitch line, offset by one full band. Sew, press, then cut one layer along the continuous line. Joining without the offset produces separate rings.
Photo references: Itch to Stitch: continuous-loop method and So Sew Easy: continuous bias tape. Their approximate area estimates can differ from this full-band model.
For straight-grain quilt edging use the quilt binding calculator. For rectangular pattern pieces use the fabric yardage and layout planner.